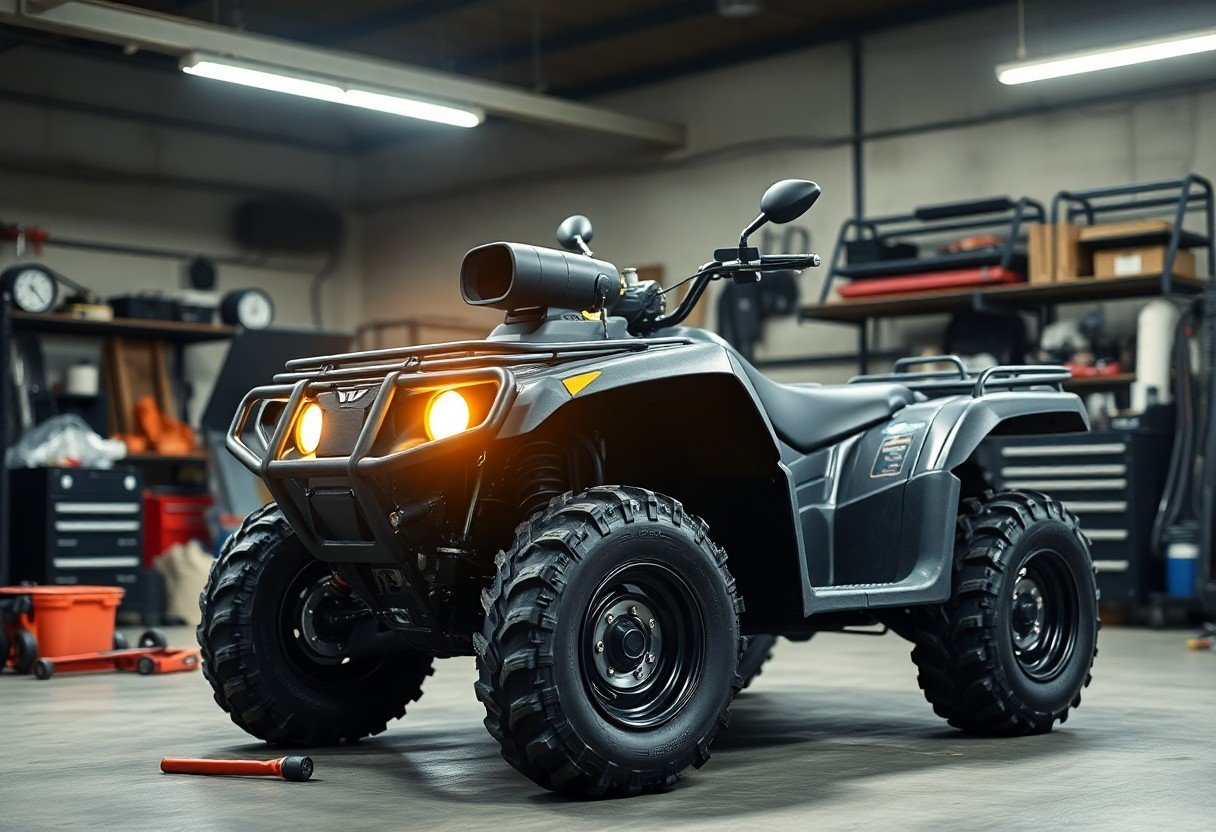
You want to enhance your ATV’s performance in muddy or waterlogged terrains, and installing a snorkel kit is a smart solution to ensure your engine stays protected. This guide will walk you through the step-by-step process for a successful installation, providing you with the confidence and knowledge needed to tackle this project. With the right tools and a bit of patience, you’ll be ready to take on those challenging trails with ease and keep your ATV running smoothly.
Types of Snorkel Kits
The market offers various snorkel kits tailored for different ATV models and uses. Understanding these types can help you choose the right one for your needs:
- Single Snorkel Kits
- Dual Snorkel Kits
- DIY Snorkel Kits
- Extended-Length Kits
- Complete All-In-One Kits
Assume that selecting the right type enhances your ATV’s capabilities and performance.
| Type | Description |
|---|---|
| Single Snorkel Kits | Best for basic water crossings and minimal modifications. |
| Dual Snorkel Kits | Offers better airflow and cooler engine operation. |
| DIY Snorkel Kits | Customizable options for specific needs and preferences. |
| Extended-Length Kits | Designed for deep water crossings, with higher intake points. |
| Complete All-In-One Kits | Comprehensive kits that cover all installation needs. |
Pre-made vs. Custom Kits
Kits are available in both pre-made and custom options. Pre-made kits provide convenience with easy installation and a manufacturer’s warranty, making them a great choice for many users. Custom kits, on the other hand, can be tailored to meet specific performance needs and preferences, though they may require more effort to design and install.
Material Options
To ensure durability and performance, your snorkel kit can be made from various materials. Common choices include plastic, aluminum, and stainless steel, each offering distinct advantages such as weight, corrosion resistance, and durability.
Premade snorkel kits often utilize high-density polyethylene or similar plastics for their balance of weight and strength. Custom kits might use aluminum for added structural integrity and appeal, depending on your aesthetic preferences. Each material choice has its pros and cons, making it important to weigh them against your specific riding conditions and usage. Consider how frequently you will encounter water, mud, and other environmental factors when determining the best material for your snorkel kit.
Factors to Consider Before Installation
Some important factors to consider before installing a snorkel kit on your ATV include:
- Your ATV’s engine size
- The snorkel kit’s design and specifications
- Local environmental regulations
- Your mechanical skills for installation
Knowing these factors will help ensure a successful installation and optimal performance.
ATV Compatibility
On selecting a snorkel kit, checking for ATV compatibility is vital to ensure proper fitment and functionality. Different models have unique specifications, so always consult your owner’s manual and confirm that the snorkel kit is designed for your specific make and model.
Intended Use and Terrain
With the intended use of your ATV in mind, you can better assess whether a snorkel kit meets your needs for specific terrains. Different terrains, such as muddy trails or river crossings, may require varying snorkel heights or features to prevent water and debris from entering your engine.
Compatibility with your chosen terrain is vital for performance. If you plan on riding in deeper waters or muddy conditions frequently, opt for a snorkel kit designed to handle those environments. This will ensure that your ATV can operate effectively and avoid potential mechanical issues related to water ingestion.
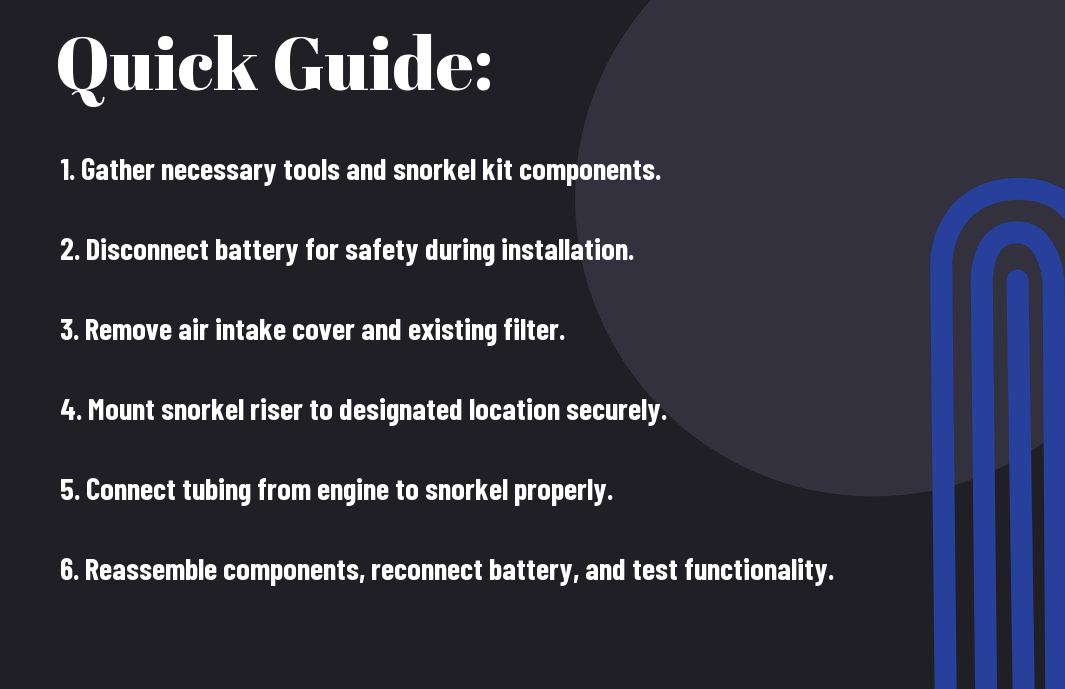
Step-by-Step Installation Process
Despite the challenges some may face, installing a snorkel kit on your ATV can be straightforward. You can find a helpful guide on Installing my snorkel kit… that outlines the process. Below is a simplified overview of the step-by-step installation.
| Step | Description |
|---|---|
| 1 | Remove the factory air intake components. |
| 2 | Assemble the snorkel kit parts outside the vehicle. |
| 3 | Install the snorkel into the designated positions. |
| 4 | Secure all mounting points and check for leaks. |
Required Tools and Materials
Assuming you have chosen your snorkel kit, the required tools and materials include basic hand tools like a wrench set, screwdrivers, and possibly silicone sealant. Additionally, having a clean workspace will help you organize parts effectively and expedite the installation process.
Detailed Installation Instructions
If you’re ready to probe the installation, start by prepping your ATV. Remove the factory air intake components to make space for the snorkel kit. Next, assemble the snorkel kit outside the vehicle to ensure that each component fits correctly. Once assembled, install the snorkel into the designated openings, securing all parts tightly to prevent any leaks during operation.
It is advisable to double-check each connection and perform a test run after the installation. This ensures that everything works as intended, and any adjustments needed can be made promptly. Following these instructions will help you effectively install your snorkel kit and enhance your ATV’s performance in deeper water.
Tips for Successful Installation
All successful installations require attention to detail and patience. Follow these tips to ensure your snorkel kit goes on smoothly:
- Read the instructions thoroughly before starting.
- Organize your tools and parts in advance.
- Don’t rush; allocate enough time for the installation process.
- Double-check all connections to avoid leaks.
Thou will ensure a reliable performance by adhering to these tips.
Common Mistakes to Avoid
You should be aware of common mistakes that can hinder your snorkel installation. First, neglecting to clean the areas where you’ll be mounting components can lead to poor adhesion. Additionally, skipping the water test before sealing can result in missed leaks. Ensure you have all the necessary parts and tools to avoid last-minute runs to the store. Finally, always tighten your connections properly; loose fittings can cause performance issues.
Maintenance Tips
Installation is only half the battle; proper maintenance is key to extending the life of your snorkel kit. Regularly inspect all parts for any signs of wear and tear. Clean out any debris that may accumulate in the snorkel to maintain airflow and efficiency:
- Check seals and gaskets for any cracks or breaks.
- Inspect the air filter regularly and clean as needed.
- Make sure all connections remain tight and secure.
Thou can enjoy a long-lasting snorkel experience by following these maintenance tips.
It’s imperative to keep your snorkel kit in optimal condition. Changing the air filter regularly will ensure that your engine receives clean air, while periodic inspections will help catch issues before they escalate. Be proactive in your maintenance routine to safeguard against possible damage and ensure peak performance:
- Schedule routine checks every few months.
- Lubricate moving parts to prevent rust.
- Store your ATV in a sheltered environment to avoid exposure.
Thou will find that maintaining your kit enhances the longevity of your investment.
Pros and Cons of Installing a Snorkel Kit
Once again, it’s important to weigh the benefits and drawbacks of installing a snorkel kit on your ATV before proceeding. Below is a summary of the pros and cons to help you make an informed decision.
Pros and Cons Breakdown
| Pros | Cons |
|---|---|
| Improved water fording capability | Complex installation process |
| Better air intake in dusty conditions | Increased maintenance requirements |
| Enhanced performance in muddy terrain | Potential for air filter clogging |
| Reduced risk of engine hydro-lock | Higher initial cost |
| Allows for modification of air intake system | Could void manufacturer’s warranty |
Advantages of Snorkel Kits
Snorkel kits enhance your ATV’s performance by allowing it to tackle watery trails and deep mud without the risk of engine damage. By raising the air intake above potential water levels, snorkel kits significantly reduce the chances of hydro-lock that can arise from submerging your ATV. These kits also keep your engine’s air supply cleaner in dusty environments, improving overall efficiency and longevity.
Potential Drawbacks
One downside to installing a snorkel kit is that it may complicate maintenance tasks. With additional components, your ATV may require more regular servicing to ensure everything remains in top condition. Additionally, you may encounter challenges during the installation process if you are unfamiliar with mechanical tasks.
To ensure that you can effectively maintain your snorkel kit, you’ll need to familiarize yourself with the setup and its components. Some users might find that snorkel kits lead to air filter clogging, requiring frequent cleaning. The initial cost can be a concern too, especially if you’re on a tight budget. Weighing these potential drawbacks against the advantages is important to decide whether a snorkel kit aligns with your usage needs and maintenance capabilities.
Frequently Asked Questions
To address common concerns, you might wonder how long the installation process will take. Typically, you can expect to spend a few hours, depending on your mechanical skills. Another frequent question relates to the maintenance of your snorkel kit; regular inspections will ensure it functions well. You may also ask about compatibility; always check if the kit is designed for your specific ATV model. Finally, consider the benefits: a snorkel allows for deeper water crossings, enhancing your off-road adventures safely and effectively.
Final Words
Ultimately, installing a snorkel kit on your ATV is a straightforward process that enhances its performance in water. By carefully following the instructions and ensuring all components are secure, you can make your ATV more capable for adventurous rides. Don’t forget to check Tips for Installing a Snorkel Kit on Your ATV for additional insights that will guide you through the installation process smoothly.
FAQ
Q: What tools are needed to install a snorkel kit on my ATV?
A: To install a snorkel kit on your ATV, you will typically need the following tools: a socket set, wrenches, a drill with drill bits, a utility knife, and possibly screwdrivers. It’s also useful to have zip ties, silicone sealant, and electrical tape on hand for securing and waterproofing connections.
Q: Do I need to modify my ATV to install a snorkel kit?
A: Yes, installing a snorkel kit often requires some modifications to the ATV. This may involve cutting holes in the front and rear panels to route the snorkel tubes, securing the intake parts, and properly sealing any connections to prevent water ingress. Follow the specific instructions provided in your snorkel kit for detailed guidance.
Q: Can I install a snorkel kit by myself, or should I seek professional help?
A: Many ATV owners choose to install snorkel kits themselves, especially if they have basic mechanical skills and tools. However, if you feel uncertain about the process or do not have experience with such modifications, seeking professional installation can ensure that it is done correctly to avoid any potential issues.
Q: How do I ensure that the snorkel kit is sealed properly to prevent water leaks?
A: To ensure a proper seal, use silicone sealant around the areas where the snorkel tubes connect to the air intake and any other openings. Make sure to follow the instructions included in your snorkel kit for sealing methods. Using zip ties, clamps, or screws appropriately will also enhance the seal and prevent leaks.
Q: What are the benefits of installing a snorkel kit on my ATV?
A: Installing a snorkel kit allows your ATV to operate effectively in deeper water and muddy conditions by elevating the air intake above water levels. This enhances the performance and reliability of your ATV in challenging terrains and reduces the risk of water entering the engine, which can lead to significant damage.
Q: How do I test if my snorkel kit is functioning properly after installation?
A: After installation, you can test the snorkel kit by taking your ATV into a shallow body of water (ensuring that the water level is below your snorkel intake) and observing if the engine runs smoothly during the test. Check for any signs of water coming through the intake or leaks in the connections. It’s also advisable to conduct a dry run in normal driving conditions to ensure all components are properly secured and functioning.
Q: Is there any maintenance required after installing a snorkel kit?
A: Yes, after installing a snorkel kit, it’s important to periodically check the connections and seals for any wear or damage, especially after thorough use in wet conditions. Clean the snorkel filter regularly if your kit includes one, and inspect the air intake for clogs or debris to maintain optimal performance.
Leave a Reply